Warzone Duel for free-to-play alliances typically ends in a huge cost without any benefit. It can be demoralizing to be wiped so easily by a couple of big money spenders. With proper planning, you can make a difference!
Defending
The typical Warzone Duel defense usually is “warp and surround the nearest cannon”. This strategy sucks if you are a mainly free-to-play alliance and outnumbered by whales. Why? Simple…
1 level 30 whale (with 2 maxed squads) can attack 500 level 27 bases, impose 500,000 troop losses, and take maybe 1,000 troop losses. This strategy, by itself, is a resource spend without any gain.
Higher tier bases just 3-4 million more in 1st squad strength can impose a 20:1 casualty rates. So, if the plan is to just warp in the mud and get wiped in seconds, then you are a fool.
The Real Plan
The Platoon Organization
There are reinforcer bases and attack bases. There should be wayyy more reinforcers than attackers. At no time should a base be unbubbled and not reinforced to the max.
We should not suffer a defeat on a base! We should be garrisoning our unbubbled “attack” bases to the max and those players should be quick to warp when threatened by a whale. If we take a loss, we should be quickly destroying the base that is hitting on of our attackers. Otherwise, the attacker needs to warp.
Our reinforcer bases should be bubbled. We need 5 reinforcers for each attack base. So, you should be in 6 man groups (platoons). You will need one strong reinforcer at least per platoon. For example, your alliance has:
- 3 lvl 27s
- 5 lvl 26s
- 20 lvl 24-25s
You have enough for three platoons each platoon will organize as such:
- 1 lvl 27 attacker
- 1-2 lvl 26 anchor reinforcers
- 4 lvl 24-25 reinforcers
The extras need to be prepared to run as filler reinforcers. They should constantly be marching their first squads to resource tiles. When a base is hit and the squads are defeated, they immediately fill in.
Step 1: Identify Whale Target
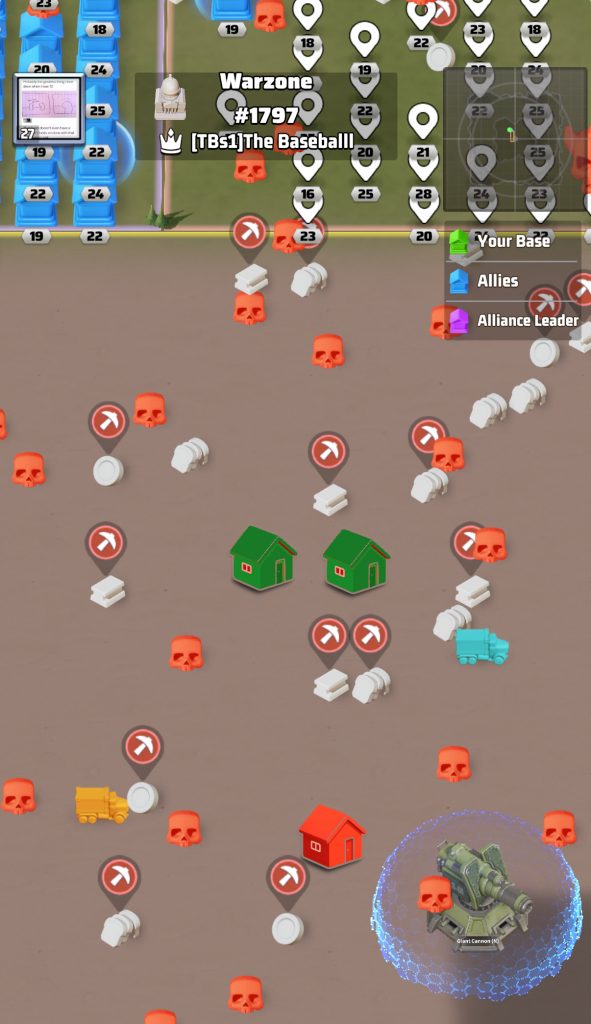
First, you identify your whales. They will be anchoring the attacks. In the following image, a level 30 whale is in red. He is anchoring the attack on the gun with smaller support bases hitting our server bases. Take him out first. Timing is critical.

Step 2: Reinforcers March on Resource Tile
The reinforcers will march on resource tiles that put their squads in a direct path of the whale. They will send both their 1st and second squads.
Step 3: Hitter warps and is garrisoned
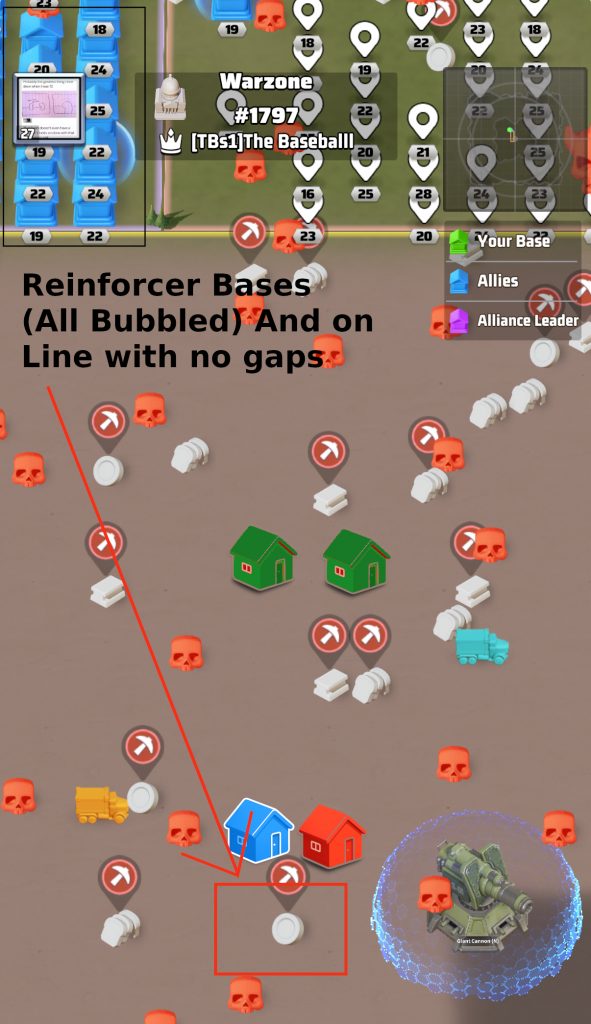
At this point, 10 squads are on the march. Just about 20 seconds from reaching the whale in their path, your captain (hitter) will warp into position.
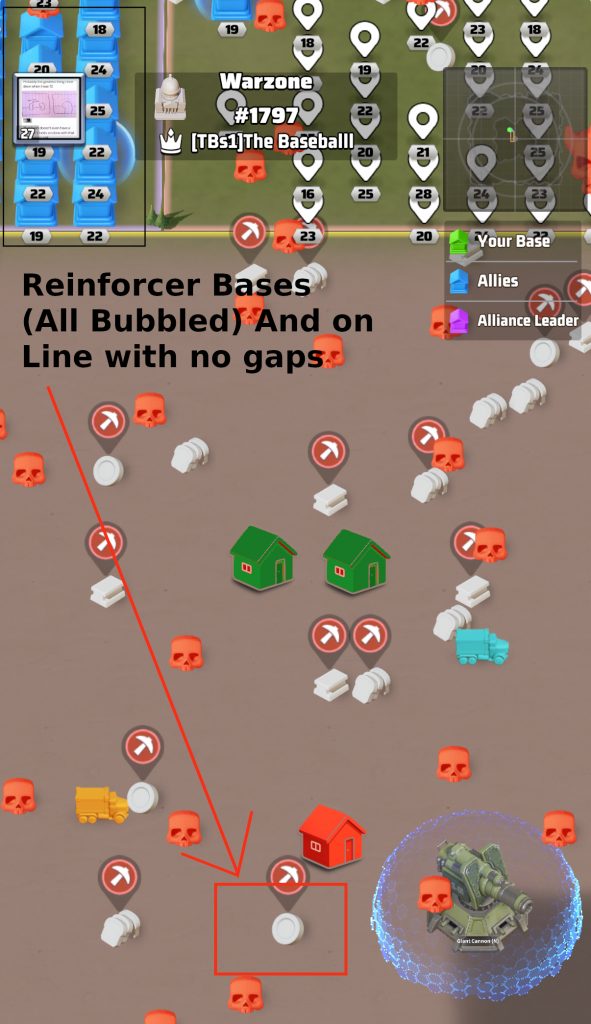
The following image shows the identification of the line of march for the whale targeted.

To achieve this. your captain needs to be screenshotting and sharing the chosen whale OR share the whale’s coordinates. The defenders will calculate their own line of march. Once troops are sent, the captain will monitor the march and warp into position adjacent to the whale.

Defender 1, defender 2, and defender 3 will reinforce with 1st squad. Defender 4 with 2nd squad.
The remaining squads on standby to garrison need to be constantly hopping in the vicinity. You should return the squads, let them march 20 seconds, then march back on the resource tile.
Active Garrisoning
You should only absorb 2-3 hits as a garrisoned reinforcer. When your Garrsioned base receives a hit, your defenders need to return squads and replace them with your standby squads. Each time you are hit in garrsion, you are losing troops. Replace them regularly.
As soon as hits are being taken, start marching your standby squads. ONLY THE DEFENDER CLOSEST SWAPS OUT! So if defender 2 is right at the captain base, then they return their garrison. Only when defender 2 has swapped out does the next one go.
When all troops are burned, every defender should be garrisoning first squads.
Active Monitoring and Retreating
The captains need to be conscious of what is hitting their base. Their defenders are their only reason for being able to attack. When their defenders are being overwhelmed, they need to retreat. Active retreating will keep us in the fight!
Captains: Choose Targets You Can Defeat
Captains who are taking on a larger whale needs to attack in unison. They need to be ready to catch the whale marching with their squads. The need to be timing those hits correctly. And they also need to be mindful of spacing. Be close, but not too close. The whale needs to have a march distance to the captains so that the captains can be hitting the whale on the march!
- Attack in Unison
- Be close, but not too close
- Be ready to retreat!
Organizing Your Platoons: The Major
You will need somebody to organize your platoons. We will call this the “Major”. Technically, a platoon is led by a leuieitenent?? Yea screw that word I never could spell it. Captain is easier and so is Major. So that’s why.
The Major is needed when you have 3-4 or more platoons. These groups are called “companies”. A company is comprised of 20-25 commanders.
You can organize effective strikes with 3-4 attackers against a target. with a maximum of 100 people, you could potentially have 4-5 companies, depending on if you run 4 defenders or 5 defenders.
The role of the Major is to identify areas of attack and coordinate overall goals. For example, if the Northwest gun has 3 lvl 30 whales on it. Your Major needs to know when to attack and how. The Major may issue the order for everyone to port away and have one base with no troops or reinforcements to warp a distance away and attack the target. Luring the whales squad out, they issue the order for the “bait” base to warp out and send in 2 companies to ash the whale.
Alliance Coordination: Your Politician/Colonel
Your Politician is the person that coordinates efforts between allied guilds (alliances). Your guilds should work in unison. In my guild, we have 2 free-to-play(ish) guilds that need to be coordinated. During the attack, this person’s job is to monitor and coordinate efforts between the guilds. You can call this your Colonel or whatever. It doesn’t matter. Somebody has to do it and have a designator.
Variation: 1st Squad Defenders Only
If you are outnumbered in strength, a conservative strategy is to run 8 defenders per captain. Each defender will only use their 1st squad. This provides maximum protection for the captains.
Summary Email
Aggressive
ℹ️ We will use platoons organize our troops. Each platoon will consist of 5-6 bases.

🔥 1 attacked per platoon - your Captain
🛡️ 4-5 defenders

🛑 Captains: your job is to both monitor your base AND to attack. You must NOT let your defenders get spent. Warp out when being overwhelmed.

💡 Captains: When you have no more defenders defending you, you are no longer effective.

🎯 Defenders: You need to be constantly moving your 1st and 2nd squad near the attack zone (attack vector). You will march on a resource tile and send your troops back, march on the tile, send them back. You should be doing this every 20-30 seconds, keeping your squads near the attack zone.

🧲 Defenders: When your captain has been hit, you should be sending a squad home (when you can) and replacing it with your fresh squad. As soon as that squad is home, march it back with fresh troops.

⚠️ Defenders: Try to coordinate so that there are enough fresh reinforcements around the captain. YOU ONLY WATCH YOUR CAPTAIN AND YOUR 1ST SQUAD.

🏆 Captains: Coordinate through your Major to identify targets and attack vectors.
Conservative
ℹ️ We will use platoons organize our troops. Each platoon will consist of 8 bases.

🔥 1 attacked per platoon - your Captain
🛡️ 8 defenders

🛑 Captains: your job is to both monitor your base AND to attack. You must NOT let your defenders get spent. Warp out when being overwhelmed.

💡 Captains: When you have no more defenders defending you, you are no longer effective.

🎯 Defenders: You need to be constantly moving your 1st near the attack zone (attack vector). You will march on a resource tile and send your troops back, march on the tile, send them back. You should be doing this every 20-30 seconds, keeping your squads near the attack zone.

🧲 Defenders: When your captain has been hit, you should be sending a squad home (when you can) and another defender immediately replace it. As soon as that squad is home, march it back with fresh troops.

⚠️ Defenders: Try to coordinate so that there are enough fresh reinforcements around the captain. YOU ONLY WATCH YOUR CAPTAIN AND YOUR 1ST SQUAD.

🏆 Captains: Coordinate through your Major to identify targets and attack vectors.

Leave a Reply
You must be logged in to post a comment.